 TSO23
TSO23- Posts : 17
Join date : 2018-08-06
Age : 18
 (UPDATE) How to make character mods for Puyo Pop Fever PC!
Tue Feb 16, 2021 11:05 am
Long time no see!
Welcome to this tutorial! In this tutorial, i'll show how to make character mods for PPF!
Hope you enjoy it, now let's get started!
★Tools Needed★
- ExtractPVZ
You can download it here: https://puyonexus.com/forum/viewtopic.php?t=844 . The necessary files can be found in the game's folder.
- A image editor (Such as GIMP, Paint.net or Photopea)
01- Getting Started
To get started, we must get the file of the character we want to mod. These files are located in the BIN folder and they’re named “cfXX”, “sel_XX”/sel_XX_e” and “task_cXX”.
★Character’s Numbers★
You can notice that the files they has numbers (which are represented by the X’s). Here are the characters numbers:
00 - Amitie
01 - Oshare Bones
02 - Klug
03 - Donguiraeru
04 - Rider
05 - Onion Pixy
06 - Prince of Ocean
07 - Raffine
08 - Yu
09 - TaruTaru
10 - HowHow Bird
11 - Accord
12 - Franksteins
13 - Arle
14 - Popoi
15 - Carbuncle
★Extracting the Files★
Once you get the files you want to mod, go to ExtractPVZ (make sure the files you want to extract are in the same location as ExtractPVZ), insert the file’s name and extention (ex: cf02.pvz) and click PVZ > PNG. Now you’re ready to start editing/modding the file!
02- Editing the character
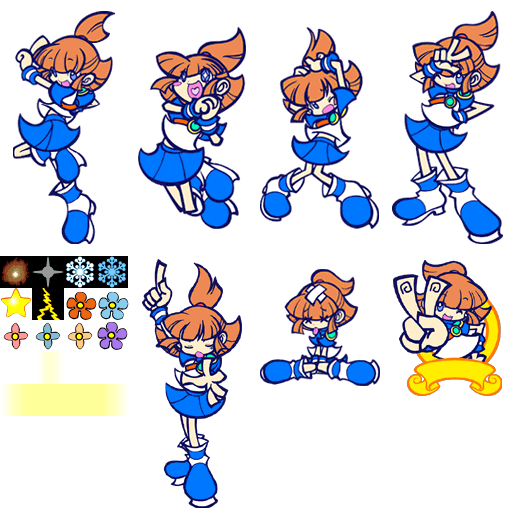
Open the texture you extracted in a image editor of your choice. With the textures opened, get the images/textures you want to use in the mod and replace it.
Here's an example, with Arle textures


While your're editing, you must make sure each part is not surpassing the other parts.
what NOT to do:

what to do:

03- Importing the mod to game
Once you finish editing the textures, go to ExtractPVZ, insert the edited texture(s) file(s) name (don’t forget the extension name!) and click PNG > PVZ. Next go to BIN folder and replace with the original file(s) (Before you replace, be sure you have a backup of the files).
Now you have the mod ready to be used in game!
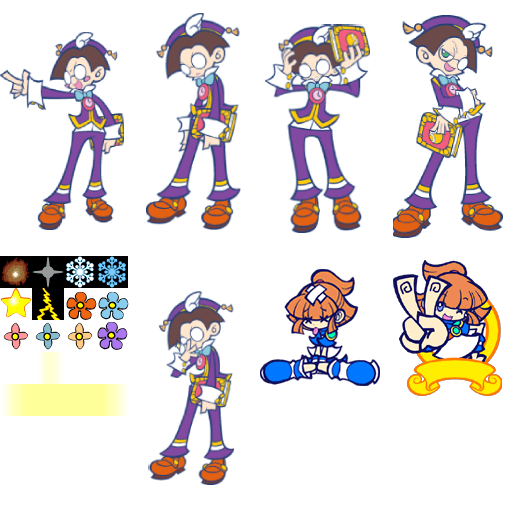
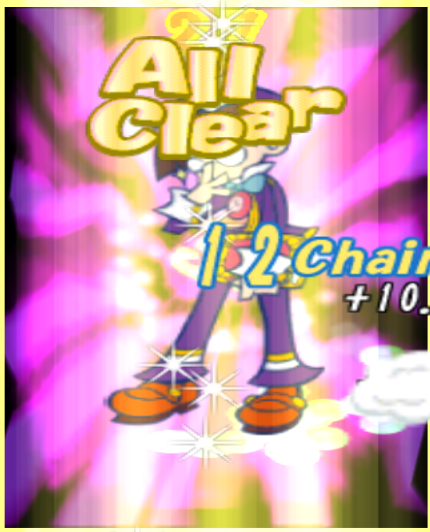
Here's a few images of the finished mod:


★And that’s it!★
Hope it’s helpful for anyone. If you noticed any issues or need help with anything, let me know so i can try to help
See ya!
Welcome to this tutorial! In this tutorial, i'll show how to make character mods for PPF!
Hope you enjoy it, now let's get started!
★Tools Needed★
- ExtractPVZ
You can download it here: https://puyonexus.com/forum/viewtopic.php?t=844 . The necessary files can be found in the game's folder.
- A image editor (Such as GIMP, Paint.net or Photopea)
01- Getting Started
To get started, we must get the file of the character we want to mod. These files are located in the BIN folder and they’re named “cfXX”, “sel_XX”/sel_XX_e” and “task_cXX”.
★Character’s Numbers★
You can notice that the files they has numbers (which are represented by the X’s). Here are the characters numbers:
00 - Amitie
01 - Oshare Bones
02 - Klug
03 - Donguiraeru
04 - Rider
05 - Onion Pixy
06 - Prince of Ocean
07 - Raffine
08 - Yu
09 - TaruTaru
10 - HowHow Bird
11 - Accord
12 - Franksteins
13 - Arle
14 - Popoi
15 - Carbuncle
★Extracting the Files★
Once you get the files you want to mod, go to ExtractPVZ (make sure the files you want to extract are in the same location as ExtractPVZ), insert the file’s name and extention (ex: cf02.pvz) and click PVZ > PNG. Now you’re ready to start editing/modding the file!
02- Editing the character
Open the texture you extracted in a image editor of your choice. With the textures opened, get the images/textures you want to use in the mod and replace it.
Here's an example, with Arle textures


While your're editing, you must make sure each part is not surpassing the other parts.
what NOT to do:

what to do:

03- Importing the mod to game
Once you finish editing the textures, go to ExtractPVZ, insert the edited texture(s) file(s) name (don’t forget the extension name!) and click PNG > PVZ. Next go to BIN folder and replace with the original file(s) (Before you replace, be sure you have a backup of the files).
Now you have the mod ready to be used in game!
Here's a few images of the finished mod:


★And that’s it!★
Hope it’s helpful for anyone. If you noticed any issues or need help with anything, let me know so i can try to help
See ya!

Permissions in this forum:
You cannot reply to topics in this forum
